|
Edit ticket layout |
Top Previous Next |
Ticket layout window
Sample tickets
The ticket layout window displays a sample ticket which you can edit. Depending on the number of sections and numberings of your venue, a certain number of sample tickets is available between which you can switch using the tabs on top. You have two options:
A.) Show sample tickets for: Each numbering (recommended)
![]()
Sections can be grouped by their numbering, e.g. all numbered sections. For each group a combined sample ticket is shown which you can edit. The text and formatting of the sample ticket is automatically copied to all group members.
This setting has the advantage that you do not have to edit a separate ticket for each section, but only one combined ticket for each group.
Variables on the sample tickets are always replaced by the longest value occurring in this group. Therefore value of different sections can be displayed on the same sample ticket. This is restricted to the layout window and does not occur when you print tickets.
B.) Show sample tickets for: Each section
![]()
If you want to have a different ticket layout for each section you must show a sample ticket for each section. Variables on the sample tickets are replaced by values from the section.
This distinction is important if you want to have a different ticket layout for each section. Click with the right mouse button on the tabs to switch between the two options. See also Sample tickets and copying.
Lines
| · | You can move lines and pictures with the mouse or edit them in the toolbox. |
| · | Clicking on a line or picture with the right mouse button opens a context menu with the most important features. |
| · | Double click a line to edit its text. |
| · | Double click on the ticket to create a new text line. |
Variables are filled with the longest value of the section or group. Numbers are replaced by zeros. Hence is the shown sample ticket a combinations of the longest possible variables and does not necessarily reflect a combination of a real existing ticket.
Rulers and ticket format

The sample ticket is surrounded by two rulers which display the printable area (white) and the text margins (triangles). Double click on the rulers to change ticket format and margins. See also Change ticket format.
Statusbar
![]()
The statusbar lists the selected sample tickets and copying. The Copying of text and format is particularly important, because it determines whether text and formatting are copied from the displayed sample ticket to all other sample tickets. See also Sample tickets and copying
Tool window
The toolbox has on three pages all feature to edit the ticket layout:
![]()
Lines

A ticket can have up to seven text lines and eight function lines. While text lines can have any text, function lines serve special purposes, have special variables, and are printed only onto some of the tickets. For example are date, time, title etc. entered into text lines but the row number is entered into its special function line (line for row and seat). See also Line types.
| · | To edit a line switch to the lines page and select the line in the list. Now switch to edit line. You can also click on a line on the ticket. |
| · | You can also create a new line by double clicking on the ticket. |
Edit text and use variables

| · | Enter the text for the line. A text can contain variables (!X) that are replaced with the specific values when the ticket is printed. Variables consist of an exclamation mark and a capital letter (!X). See also Variables or press |
Format & Alignment

| · | Determines the format of the whole line. Use all same to use the selected font for all lines. |
| · | Lines can be left aligned, centered, right aligned or freely aligned. The alignment free is divided into free (centered) and free (left). With free (centered) the line is centered at the set position, for example if the line is shortened by a shorter section name. With free (left) the line is left aligned to the set position. |
| · | You can move lines with the mouse or by setting the left and top distance |
| · | Left/right aligned and centered lines are aligned in the text margins. If necessary change text margins in the format window. See also Change format. |
Colored section names (only section line)

| · | If a line for section is selected, you can color code the lines with the section name to facilitate orientation (e.g. Floor green, balcony red). The default button uses the colors that were chosen when the venue was created while the button all same uses the selected color for all section. |
Advance sale price (only line for regular price)

| · | If advance sale or system fees were entered for the event you can attach the advance sale price (!H) to the price variable !P, i.e. for tickets with advance sale fees the advance sale price is added to the variable !P in the format selected on the bottom right. See also Advance sale and system fees |
| Example: |
| 1.) | Enter in the Line for regular price: "$!P" |
| 2.) | Check the option Attach the advance sale price (!H) to the variable !P |
| 3.) | Enter as Format of attached advance sale price (!H): "(advance sale !H)" |
Result:
The line for regular price on a ticket with advance sale fees: |
$20,- (advance sale 24,50) |
The line for regular price on a ticket without advance sale fees: |
$20,- |
Pictures

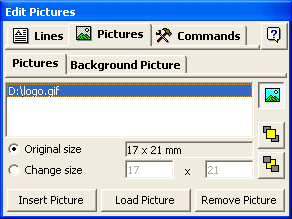
| · | A ticket can have up to 10 foreground picture. |
| · | Select the list of foreground pictures and press add to add a new picture. The picture is represented by the icon |
| · | You can bring pictures to front |
| · | You can move pictures with the mouse. |
| · | You can select if the foreground picture should be visible |
It is possible to show a background picture (e.g. a scan of your preprinted ticket with logo) to facilitate the alignment of line and foreground pictures. This picture is not printed on the ticket and serves only to give an impression of what the ticket will look like.
| · | Click the text box "background picture" and the appropriate button to load or delete the background picture. |
| · | The background picture can not be move and always aligns to the left top corner. |
Commands

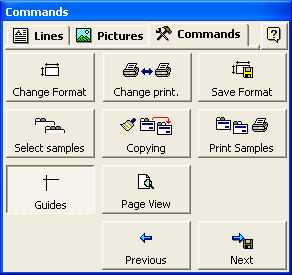
The commands page allows to
| · | Show ruler |
| · | Save to ticket format |
| · | Select the shown sample tickets |
| · | Return to the previous window |
| · | Continue and save |
Continue
After all tickets have been set up Print sample tickets to check the layout.
Press continue ![]() and go on with Save file
and go on with Save file